Backbone Radio
Radio Automation and Live Assist
Welcome to Backbone Radio – Online Radio Broadcast and Automation for your Macintosh
Everything you need to produce and deliver your programs is here in an easy to use, professional broadcasting suite. Your program quality, your listener interactivity and your success all go hand-in-hand. You concentrate on the creative and business aspects, and Backbone Radio technology will help your station prosper…on all levels.
What This Is
Backbone Radio is the software you will use to create, operate and stream your Internet radio station.You will download the client components you need to broadcast 24/7, including your content creation studio, your automation system, and your live assist broadcast console.
The server we manage and host for you “in the Cloud” is used to store and broadcast (stream) your automated programming and live shows.
Network Option
This document also touches upon network-enabled broadcasting, available on an optional basis. These features permit you to run your own multi-station network, where your stations can share each other’s audio content, which you control just by dragging and dropping from your libraries in the cloud.
First:This is an Apple Macintosh application.
For those of you with Windows, you can use your PC for other tasks. To create a professional Internet radio station, you need a professional multimedia computer, and that means an Apple Macintosh, with Backbone Radio software. Fortunately, Macintosh computers are very affordable.
The other good news is that all of your listeners can hear you whether they use a Mac or a PC, iOS or Android, via tuners like TuneIn or iHeart Radio, or via a player on your own web site, which Backbone can help you implement.
System Requirements
- Hardware: Intel Mac (iMac, MacAir, MacBook Pro, Mini)
- OS X 10.8 and above
- Audio input for live sessions, or low latency USB audio converter
- Memory: 1GB minimum
- Hard disk: 100MB available minimum, 150MB per 100 songs or audio clips (estimated)
INSTALLATION AND CONFIGURATION
Download and Get Ready
A link to download a pre-configured .dmg image will be provided to you, often in a welcome or demo email message.
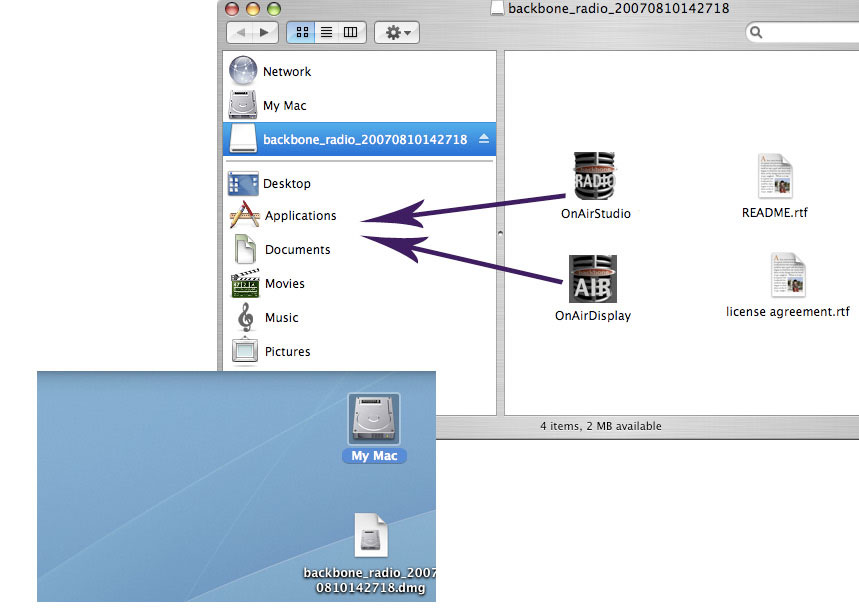
Double click your new .dmg image, and it will expand to an installer image with three applications: (On Air) Studio, Display and Backbone Producer. Drag and drop all three applications into your Applications folder.
Open the Studio Application
OnAir Studio (“Studio”) is the application you use to create your playlists and schedules, and to manage your content.

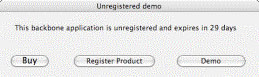
Registration Reminder
You will be reminded to buy and/or register your product.
Studio Preferences
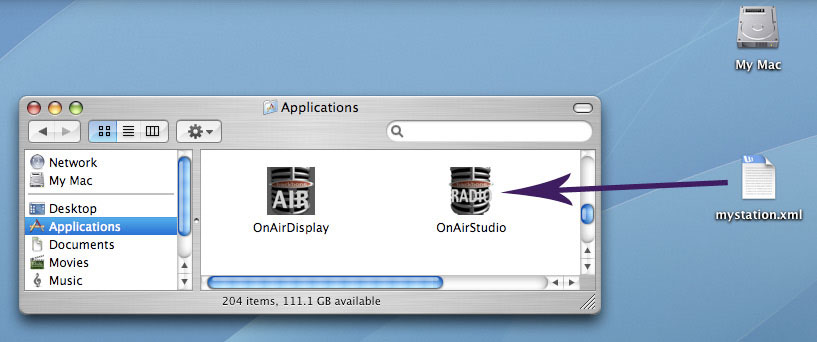
Go to OnAir Studio >Preferences > (Station Tab) to name your station.This will be your station’s permanent name, so choose a good one.
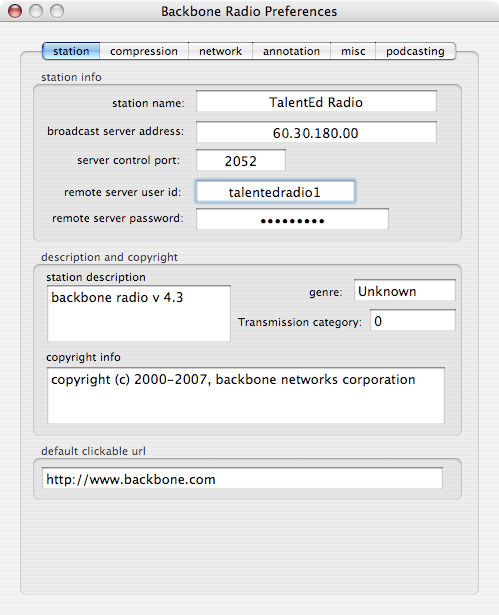 Fill in your default URL.This is where you want your listeners to go when they click on your streamed images or text info (artist, title, album “tags”) that are webcast to your listeners. Also fill in your copyright info.As an Internet radio station you will incur an obligation to treat your and others’ copyrighted material properly and to abide by laws and regulations regarding its use.In the United States and Internationally there are evolving governmental and industry requirements, and you will want to keep informed as to how they affect your station. Backbone Radio software is designed to make it easier for you to comply with the governmental reporting requirements, since it logs your station operation and allows you to easily generate reports that conform to these rules.In preparation for generating these reports later, you will want to look up your transmission category for royalty reporting.You can find out more about this at:http://www.copyright.gov/fedreg/2004/69fr11515.html
Now go to the Preferences > Annotation tab.
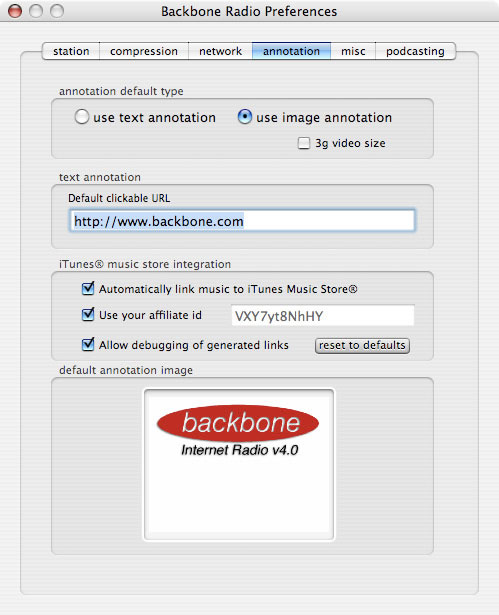 If you plan to stream images with your audio, drop your station’s default image into this box.Text tags will, as a result, appear on top of your streamed images. This is the image that will accompany songs if you did not give that song its own image (e.g., cover art).Verify the URL that goes with this image. Also, if you plan to use the iTunes Store for importing album cover art and offering e-commerce to your listeners, you can enable iTunes integration on this page. You will be able to select this for each song upon importing in your Studio application playlist window. You will need to establish an Affiliate identification code through Apple (http://www.apple.com/itunes/affiliates/) in order to earn revenues from songs that your listeners buy and download. Note: In Demo mode, this Affiliate field is not modifiable.
BUILDING YOUR CONTENT LIBRARY
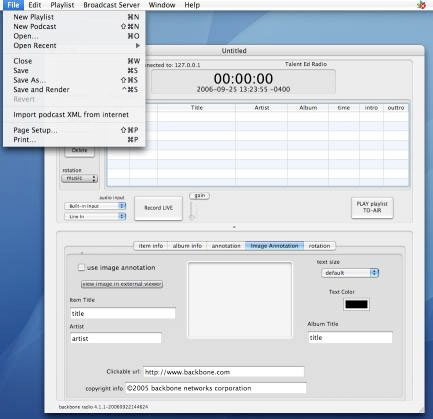
Create New Playlist
Now let’s load content into your station library.Backbone Radio OnAirStudio (“Studio”) is the application you will use to build your programming library. Open Studio. This will open your playlists and programming library. You already have one playlist in your schedule (default playlist).To make your first playlist go to File > New Playlist.A new empty playlist will appear.
Load Your Playlist
Now insert a CD, and drag-and-drop a few songs onto your new playlist. Notice that it automatically looks up and inserts the tag information for you.You can rearrange your song order by dragging the items up and down on the playlist.
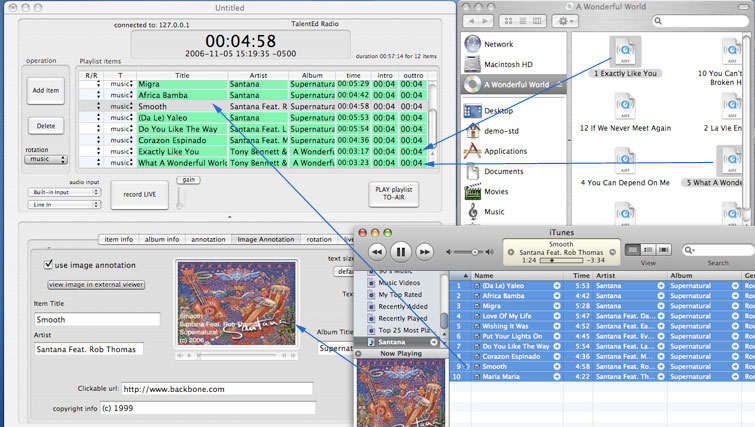
Fast Loading from iTunes
Alternatively, you can add songs by using your Add Item button and browsing to your CD, mp3 folders and other music sources.You can also drag item directly from your iTunes library and the associated tags and metadata will be added to your library for you.This means that as the new station program manager, you are already prepared to quickly build your station with a vast store of music from your iTunes library.(Note: While protected AAC files are DRM protected and can not be moved to the Backbone Radio Hosting Suite library, you can stream mp3 files, as well as AAC/mp4 tracks that you ripped from your CDs.)
If you want to add or change the tag information, or if this information did not import, you can fill it in at the bottom of the window. Use the other tabs to add/change album info; change your text sizes and colors; add images for each song; and fine tune your standard rotation weighting (for automatically creating playlists with a template).If images do not load automatically, you may manually drag them from your iTunes window into your playlist Image Annotation window’s image box. You can play with all of this later.
Importing Art and URLs from the iTunes Store
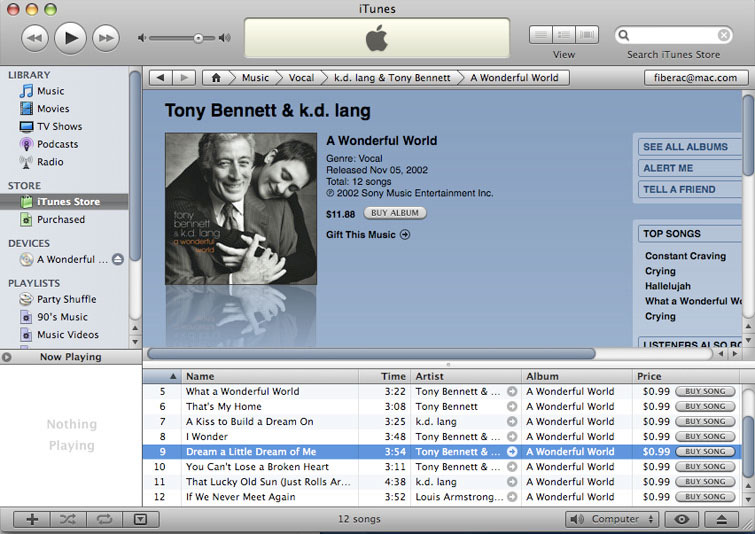
You can optionally import more information from the iTunes Store once you have your artist/song entered. For each song you select, you can click on the “get iTunes store link” button, and if that song/artist/album combination is listed in the iTunes Store, the album cover art image and the iTunes Store URL will be automatically loaded into your song’s annotation.
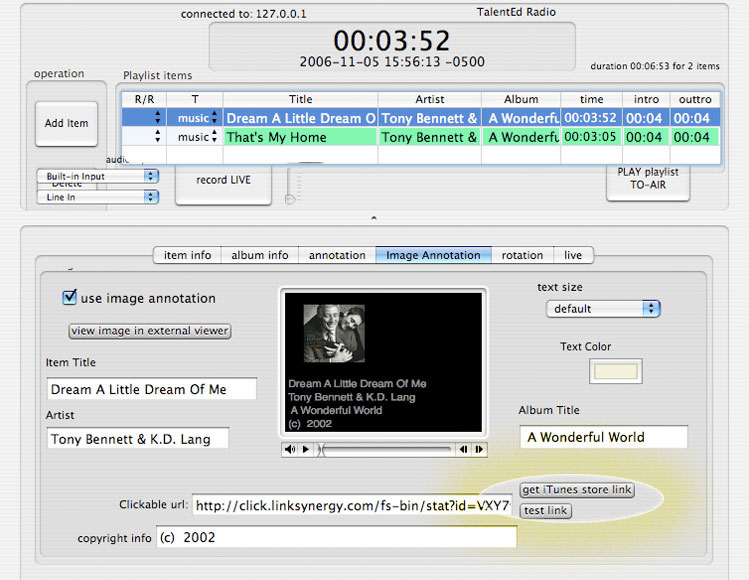
You can verify that the link takes your listener to the proper iTunes location to purchase by clicking the “test link” button. This launches your iTunes application and takes you to the URL location (via browser redirect), as illustrated.
Record Live to Disk
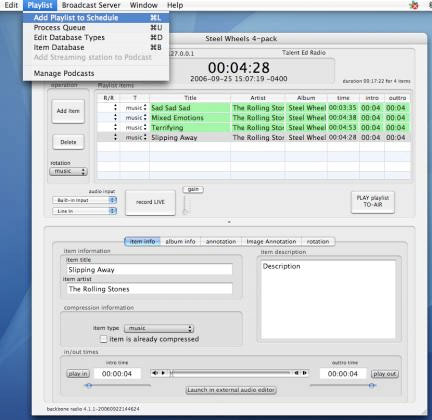
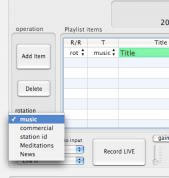
If you want to record your voice, for instance, as a clip, press the “record LIVE” button, and you will begin recording to disk immediately using the audio input specified to the left of the button.>When you press again to stop recording, your live recording will appear on the playlist.Insert the proper item information, and then treat it as you would any of your other songs or commercials.
Categories for Rotation
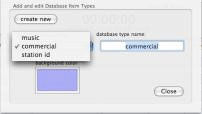
As a default, your added items are categorized as “music”. These categories will later become important as you create “standard rotation” playlists. You can change the categories for each.If you need to add or change available categories, you can do this by going to Playlist > Edit Database Types.
Save and Render the Playlist
Now that we have created a simple playlist, we need to save and render it. Do not to eject your CD before you finish this process and your music files are transferred.Later you can learn how to rip CDs to disk and load multiple CDs to create a playlist.
How to Save, the Processing Queue
When you Save and Render, your software takes you to a window called the Processing Queue.This area is like a music processing mill that takes your music, compresses it to the right size for streaming, it adds metadata that allows your music to stream properly, and then it transfers and files your music in your Item Database so your server can access it like a jukebox.
To process your playlist go to File > Save and Render.>Name your playlist and save.>Now the Processing Queue appears.
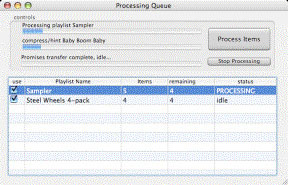 Click the Process Items button, and the playlist(s) begin compressing and transferring.When it is complete, you can eject your disk or source material.
Add Playlist to Schedule
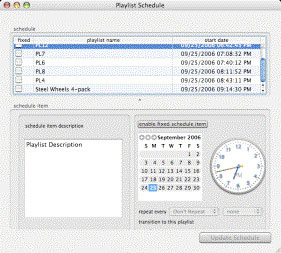
The Schedule
Your playlist is part of a schedule that contains other playlists, and each can be floating (one that starts when the previous one has finished) or fixed time.At least one playlist in your schedule must remain floating in case you forget to update your fixed schedule items.You can rearrange schedule items (playlists) by dragging and dropping them within the application.
The Item Database
Now that your songs are in the server’s Item Database (Playlist > Item Database), you can use them to make new playlists just by dragging songs from the Database onto your playlist.
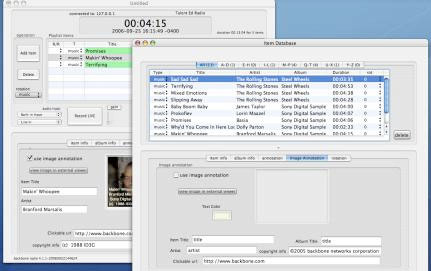
To quickly find songs in your Database, use the shortcut command-F, and enter your search criteria.
BROADCASTING/WEBCASTING
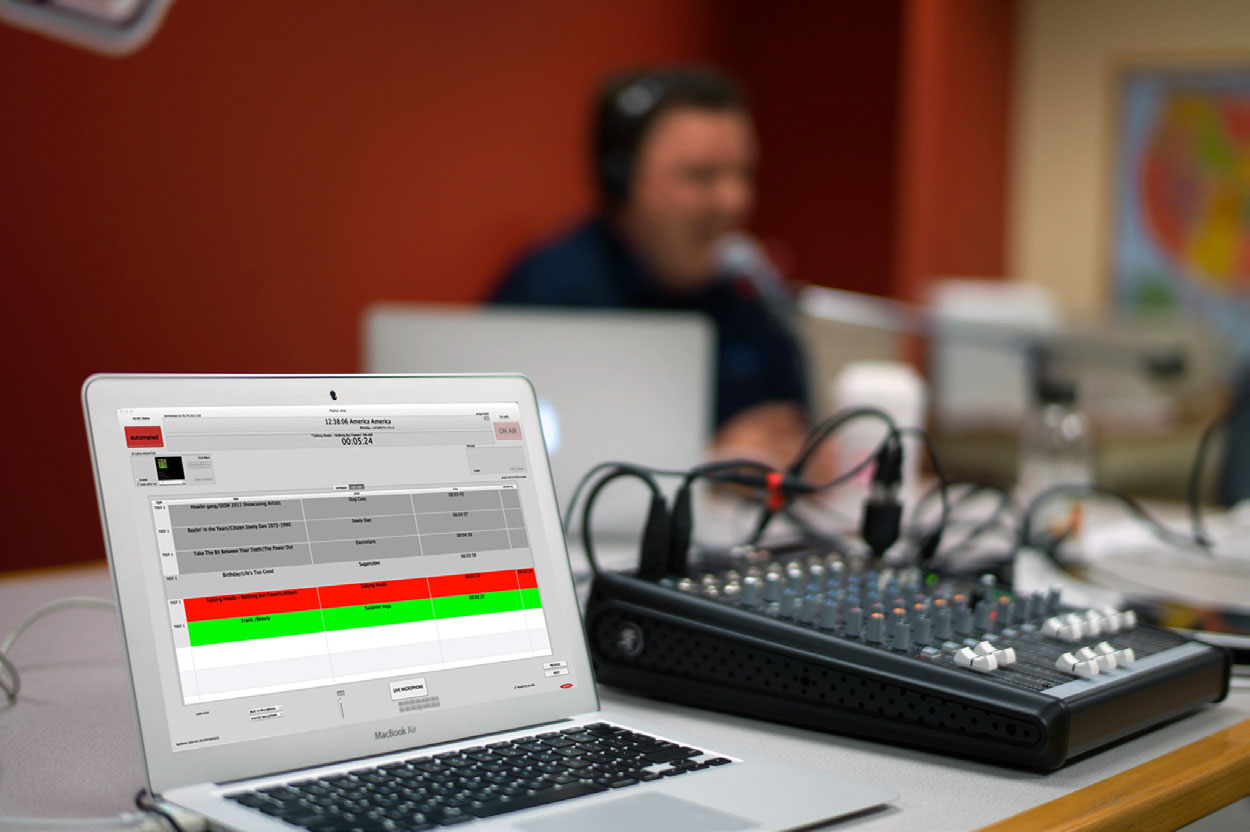
The Backbone Radio OnAidDisplay application is how you broadcast Live and Automated programming that you built with the OnAirStudio application.
Open OnAir Display Application
This application is your DJ interface. This is where you can manually command automated playlists, and its your console for live broadcasts.
Configuring OnAir Display Preferences
For a quick start, there is nothing for you to do in Preferences, since defaults were set for you in the OnAirStudio application.Your live data rate is set to normal voice quality.You may wish to change playlist color schemes later, and specify a folder for your stub movies (links for your audience to tune in).Unless you choose otherwise, your station will be broadcasting with images.Later we will see how to change your default images for your live broadcast segments.
Now it is time to start broadcasting.
OnAir Display Monitoring and Controls
OnAir Display Monitoring
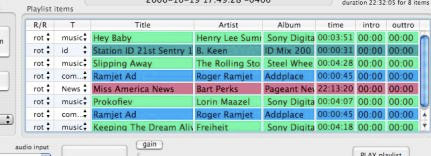
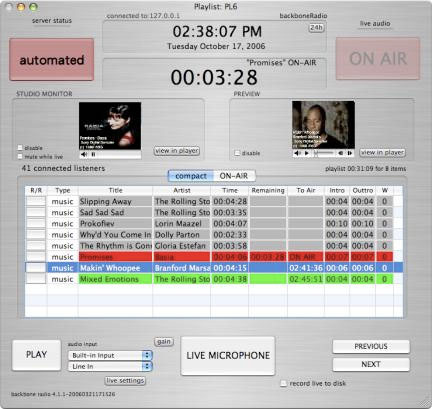 Everything you need to know about the station’s operational status is on this screen.
Let’s see what it tells us, starting from the top of the window.
- It tells us that we are connected to our server and what our server’s IP address is.
- We are using a 12 hour clock.Press 24h button to use 24 hour clock.
- Our local time/date, based on our computer’s clock, is shown.
- We are currently operating in Automated mode.
- If our microphone were live, the ON AIR button would be illuminated.
- The currently playing song is Promises. Remaining time is 3:28, counting down.
- Your studio monitor is operating, providing you with real time audio. (Your audience will hear it delayed by approximately 8 seconds.) This will help you time your live/recorded segues.Click view-in-player to launch your studio monitor in a separate QuickTime player.
- The Basic cover art (left) is the image that displays to our audience.
- This information also is shown in red on the playlist; currently playing item.
- The selected item (blue playlist item) is shown in the Preview window (right).
- There are 41 listeners tuned in at this moment.
- Our 8-item playlist runs 31:09 in length.
- The next song will begin at 2:41:36 pm.
- Unplayed items are shown in green.Played items are grey.You can choose colors.
- All items shown are music type.Others categories might be news, commercials, etc., and are user-definable as you want.
- Because all of the R/R item fields are blank, none of the playlist items are rotational items.
Controlling the Playlist and Going Live
Controls are shown at the bottom of the window
- The Play button is used to begin playing any selected item when the current item is finished playing.
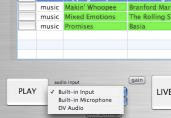
- Your live audio input devices may be selected at any time from pop-up menus.
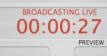
- The Live Microphone button is pressed (and the button then darkens) to take you into live mode after the current item is finished playing.It will remain depressed until you are live, unless you press it again to cancel going live.Press Next while Live Mic is depressed to go live immediately.The counter display will count up your elapsed live time in red.
- Note: When you first go live, you may hear the last few seconds of the previous song still playing (determined by that song’s outtro time). This is your opportunity do a voice over on the end of that song.
- To exit live mode and return to the automated schedule, simply press Live Microphone button again (it lightens color), and you will exit live mode in five seconds and see a yellow countdown.

- Press the Gain button to unveil your microphone gain slider control.
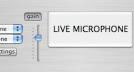
Note: This will not only control gain for your microphone, but also for any mixer input you use for live broadcasts.
- Check the Record Live to Disk box to record your live audio to disk. When you exit live mode, your live segment will appear as a segment entitled Live Recording in the playlist which you can rename, save and use in an automated playlist later.
- Press the Previous button to go to the previous playlist item immediately without waiting for the current item to finish (interrupt mode).
- Press the Next button to go to the next playlist item immediately without waiting for the current item to finish (interrupt mode).
Rearranging the playlist order, adding songs
Even though your playlist is saved with a certain sequence, you can change it on the fly for just this performance.Using drag and drop, you can move items up and down in your playlist. You can also temporarily add songs/items by dragging them to the playlist from your Database (OnAir Studio > Playlist > Item Database).
Creating Rotational Playlists
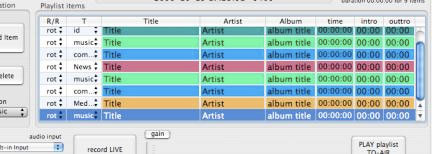
Keeping your station sounding fresh can be a lot of work.Fortunately, Backbone Radio Standard includes an incredibly easy way to have your broadcast server automatically generate fresh new playlists using a mechanism known as “standard rotation”.Basically, this is a rules based method of creating playlists onto your set of play list templates.
To create a rotational playlist, first create a new playlist from the File menu (OnAir Studio > File > New Playlist). Now you will create a playlist consisting of rotation items, each with a specific category (music, news, etc.).
To place these items, select each item’s category in the rotation pop-up menu. Release the button, and that item now appears on the playlist. Now repeat until your playlist order is the sequence you want. Drag and drop to rearrange. This is our sample rotation template playlist.
Next we save the playlist, and we will arbitrarily call it “rot-1”.Then we add it to our Schedule, under the Playlist menu.To play it immediately after the current song finishes, press the “PLAY playlist TO-AIR” button.OnAir Studio will automatically generate a playlist from corresponding items in your Database just prior to going on the air.
The more clips you have in your Database of each type, the greater the freshness you will get.Generate other templates in this way, and you will have a very attractive and fresh sounding station.
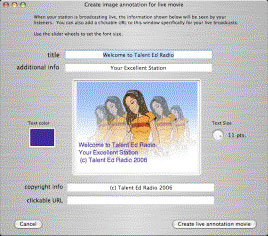
Changing Live Image Annotation
In your OnAir Disply application, you may want to use a different image and text set for your live segments than you use as your station default.To make this change, go to OnAir Display > File > Change Live Annotation.Drop in an image, change your text, size and color as required.
Generating Stub Movies
![]() Stub movies are your audience’s link to your station.Instead of sending your target listeners a string of characters, your station will automatically generate an object that you can send them.>When they click on the.mov “movie” object, it will launch your station.You can embed this movie on your web page, and readers will be able to click and listen.To generate your station’s stub movie,go to OnAir Display > File > Generate Stub Movies.Two movies are created, one using port 8080, and an alternate for port 7070 for listeners who may have firewall problems.Most can use 8080.You can find them in the folder you specify.
Stub movies are your audience’s link to your station.Instead of sending your target listeners a string of characters, your station will automatically generate an object that you can send them.>When they click on the.mov “movie” object, it will launch your station.You can embed this movie on your web page, and readers will be able to click and listen.To generate your station’s stub movie,go to OnAir Display > File > Generate Stub Movies.Two movies are created, one using port 8080, and an alternate for port 7070 for listeners who may have firewall problems.Most can use 8080.You can find them in the folder you specify.
THE RADIO NETWORK, Optional
Backbone Radio Pro is the only Internet radio software that includes a feature specifically built for syndicating and sharing content among a network of affiliated stations. Backbone Networks Corporation is actively developing these features to provide easy drag-and-drop access to the content network, including sharing of recorded material or scheduling of live feeds into your program schedule.
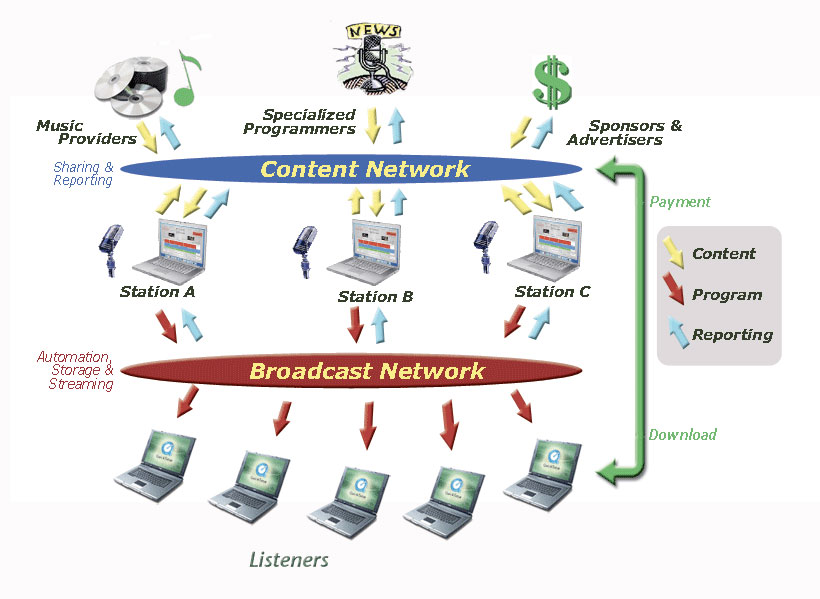
Content Network
This is the network which allows sister stations (A, B, C) to post and share content which they have created. This may include music from local bands, special interest programs, news programming or other content of interest. Stations who post content will be recognized by the Network, and newly posted material will appear in that station’s shared database automatically, ready for other stations to select for inclusion into their programs. In addition, third party content providers of music, news, commercials and special programming bring fresh, new sounds to the network by introducing new artists and material to the Network.
Broadcast Network
This is the network of broadcast streams bringing the resultant programs from the stations to the listeners. It is an elastic combination of content storage, automation, program rotation, streaming bandwidth and audience logging/reporting. It also enables revenue generating e-commerce through the use of clickable URLs, creating customers from listeners.
Accessing Shared Network Content
In order to add shared Network content to your programming, in your OnAir Studio application, pull down the Broadcast Server menu and select Network Feeds.

This will open two new embedded applications: Network Database and Live Network Feeds.
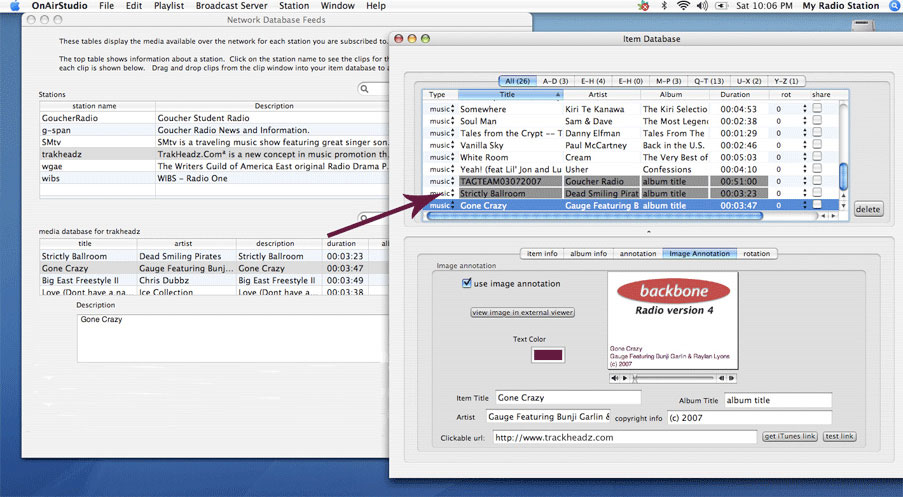
Network Database Feeds Application
Each station which shares content which is available to your station is listed in the Network Database Feeds application table. To find out what content that station currently has available for sharing, click on that station and view the various items in the table below. Note descriptions, durations and explicit tags. To find programs with a particular name, keyword, etc., across Network stations, use the search tool in the upper right corner of the window.

To bring shared items into your station’s database, open Playlist > Item Database, and drag the desired clips from the Network Database Feeds window into your Item Database. Note that items will remain greyed in your Item Database until they are fully copied onto your server. These items are not downloadable to you or your Client computer. They only are available as ephemeral (temporary) copies which remain protected on the hosted server for the purposes of streaming. These syndicated items may be treated much the same as content you imported or created, although you will not be able to modify certain fields.
Contributor Feedback
The contributor of this content, whether it be another station or third-party syndicator, will automatically receive a report of your selecting and importing this item, and will receive another report upon its airing, including your station name, the time the item was played, and how many listeners heard the item.
Live Network Feeds Application
Your station may access live streaming feeds from other stations and/or contributors who wish to share their live programs. To schedule a particular program, find the shared program(s) of interest in the Live Network Feeds application, by station. Select the station name to see its available shared live feeds, or search for a program using the search tool. To add that feed to your schedule, simply drag that program into your schedule, found in the OnAir Studio application, Broadcast Server > Schedule. This feature is currently under construction.
Podcasting
Using the same techniques, live recording and your Item Database, open a new podcast. Load the appropriate preference items as they relate to your podcast, computer and server.Then drag, drop and record to make your podcast and publish it. To create chapters, each with individual images, you will need to download a piece of software known as a “chapter tool” from Apple.
Enjoy your Station
We hope you have as much fun with your Internet radio station as we have had in helping you create it.There are a lot more features and tricks you will discover, and there are more we will tell you about later.
rac-081716